Covered Bridge at Wason Pond in Chester, NH
Monday, August 15th, 2011 @ 7:29 pm
bridge, chester, frame, nh, summer project, tfg, timber, wason pond, wood
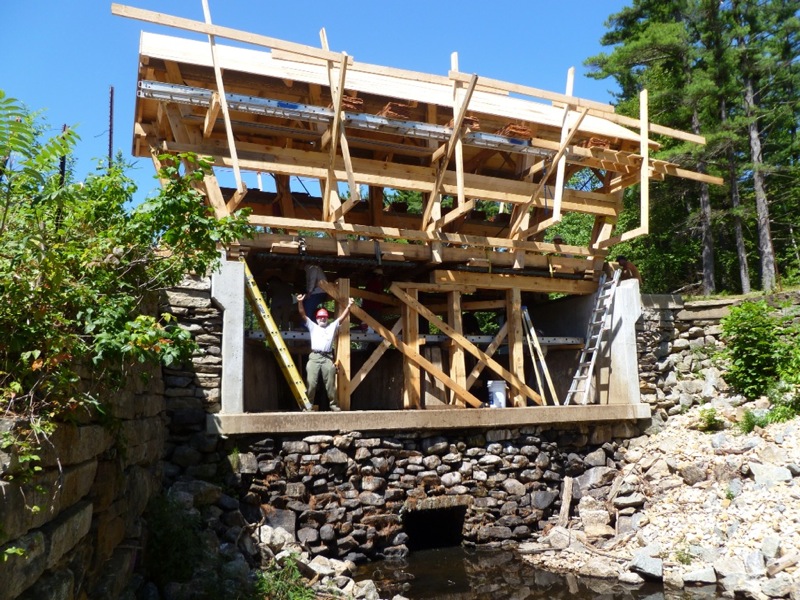
Commemorative timber framed covered bridge over a dam
This was a post-Poland project (somebody said I’d caught the timber framing bug) at Wason Pond in Chester, New Hampshire. It was a week-long project held by the TFG, and I was able to help out for a good two days on a brief vacation from working and taking a break at home with family.
It was a very cool follow-up to the Poland project, in that we were dealing with the same materials and methods, but doing it quite differently. In Poland there were no power tools allowed, and when they were used it was only by absolute necessity. But on this project power tools abounded, from giant circular saws to simple drills, my friend from the Poland trip and I were astonished every time we turned to hear another motor or see another cloud of sawdust bursting from a new cut.
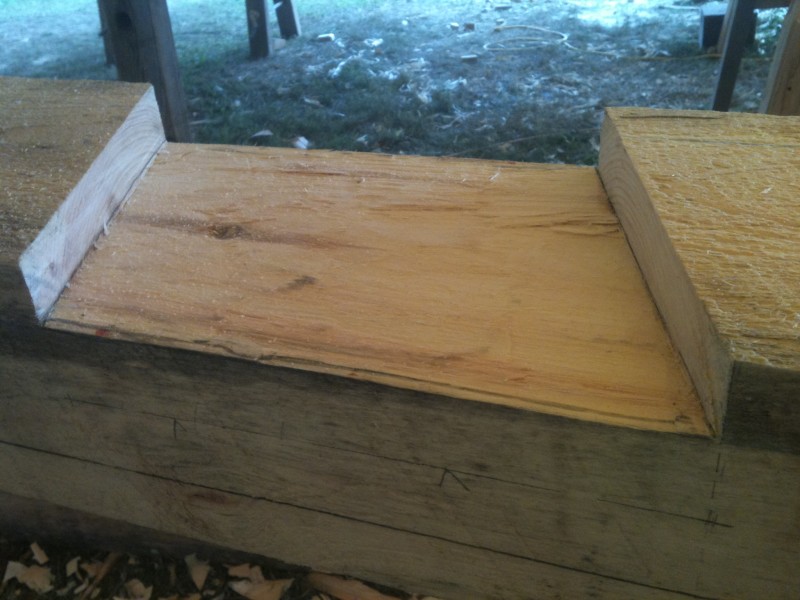
As far as my contribution, I learned about marking posts to tell exactly where in the piece they are, and about scribing and marking for joinery. When we got there, they’d laid out the upstream wall and were marking all the places where joints would need to be cut in order to assemble the whole thing.
So we would drop a plumb line (just a string with a weight on the end of it, giving us a perfectly vertical line) down the angle where the two beams met, and mark on either side of their meeting. We’d draw a line and mark an ‘X’ where it would need to be cut out, and move on to the next one.
The day was finale’d beautifully by an impressive spread laid out by a local family who had their own farm, saying “we wanted organic food for our kids, and with the land we have it was just easiest and cheapest to do it ourselves.” With some cool timber structures in their own house, we had a great time relaxing after the day’s work with a beer and warmth in the old house, eating plenty and talking with the old timber framers.
One guy I met was from Europe (forgive me, I can’t remember the country), now living in BC, and we talked about Vancouver, bike trips, and being open with people.
The next day we cut all of the joints we’d scribed the day before, which gave a real sense of satisfaction: we’d seen the thing together, marked where everything needed to be joined, and then made the cuts for those very joints. It was cool, too, to do something on both days that I hadn’t done at all in Poland. I’d hardly even seen the joinery there until my final day on the trip. After dinner that night (tacos!) my friend and I headed off, her back home and me to meet my family for a few days.
This project was a great experience. It gave me a more full sense of the timber framing process, and more of a solid understanding of how the stuff works, just by getting intimate with how pieces fit together on a large scale like that.
It’s similar to my joinery class last semester, but genuinely different, and I think I might like this stuff better. Furniture isn’t something I’m going to stop making, but working with such large timbers and making things that just look and feel so solid and hand-loved is very satisfying.
Note: Photos of myself and the project taken by Joel McCarty (TFG) or others.
Comments
Thoughts on the stuff you read? You can leave a response, or trackback from your own site.
Tim de Christopher Says:
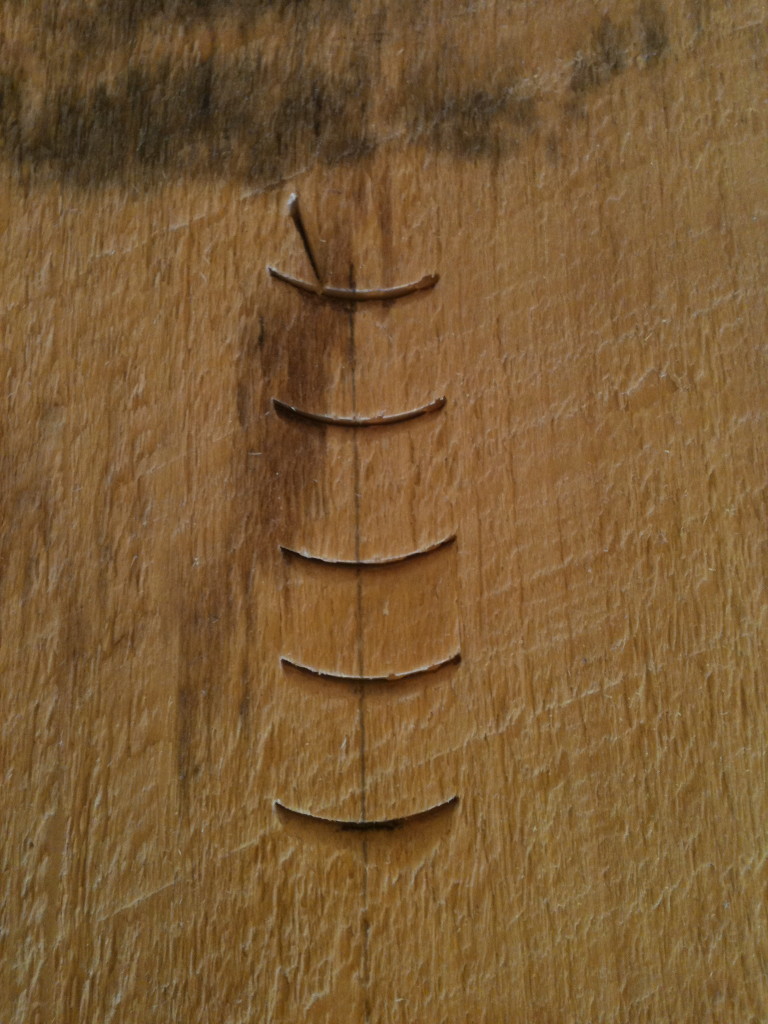
Hey Blake, I didn’t know anything about this, that would have been fun to join up again. Looks good. What’s the one image that looks like a plank with the semi-circular things?
September 3rd, 2011 at 1:20 pm
Runeshai Says:
Hey Tim! Kelly Casillio told me about this, so we went up there and worked on it together.
That board is one of the vertical posts of the bridge, the marks were our method of telling where in the structure it belonged. There was a 1 end and a 5 end (there were 5 posts along the length of the bridge), a semicircle chisel mark meant it was on the upstream side of the bridge, and the flag or tick mark at the top meant it was on the inside of the bridge (each side had two sets of posts, one that planks were nailed to and one that were exposed on the inner wall). So this one is the 5-end upstream inside post. And I cut all its joinery myself :).
September 3rd, 2011 at 1:35 pm
Will Truax Says:
Hey Blake –
I went looking for images of the Wason Pond under construction to tout up the guild and came across this one with it on the falsework – is that you standing there on the spillway, and may I make use of it as part of a cover photo for a podcast on the Guild and New Hampshire Covered Bridges?
Where have fifteen years gone?
— Will
March 1st, 2026 at 2:01 pm
runeshai Says:
Hello Will!
That is not a photo of me, unfortunately I don’t seem to have any of myself. I was probably about 25 at the time of the project. You are welcome to use any photos, though I believe the original creator of them was Joel McCarty, so feel free to ask him if you like. But as far as I’m concerned, grab any of mine and us ’em. I’d love for therer tobe another Guild build around here sometime soon. They are a treat. Be well.
March 5th, 2026 at 7:00 am
Leave a Reply