Stool
Monday, January 6th, 2014 @ 11:53 pm
experiment, furniture, sculpture, stool, wood
Always a fan of experimenting and playing, I took on this project (and this class) as a last-minute thing, and it became a pivotal part of my semester. Funiture Design, taught by Peter Thibault and Judith Hanson, ran alongside the new Furniture Certificate program, a collaboration with the North Bennett Street School, the MassArt portion of which is taught by Mitch Ryerson. I got advice from at least the three of them over the course of the semester, as well as other students and woodshop faculty. You could say I made the shop my home this semester, officially.
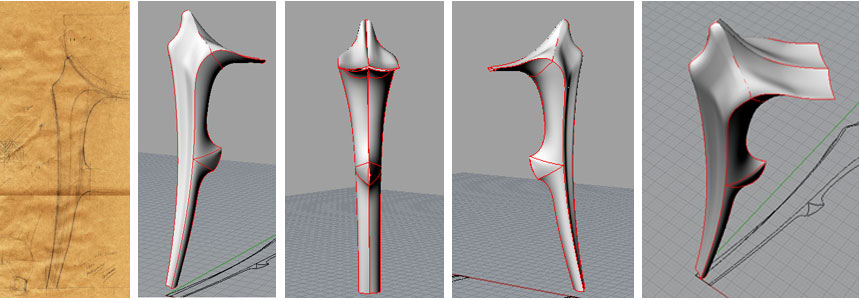
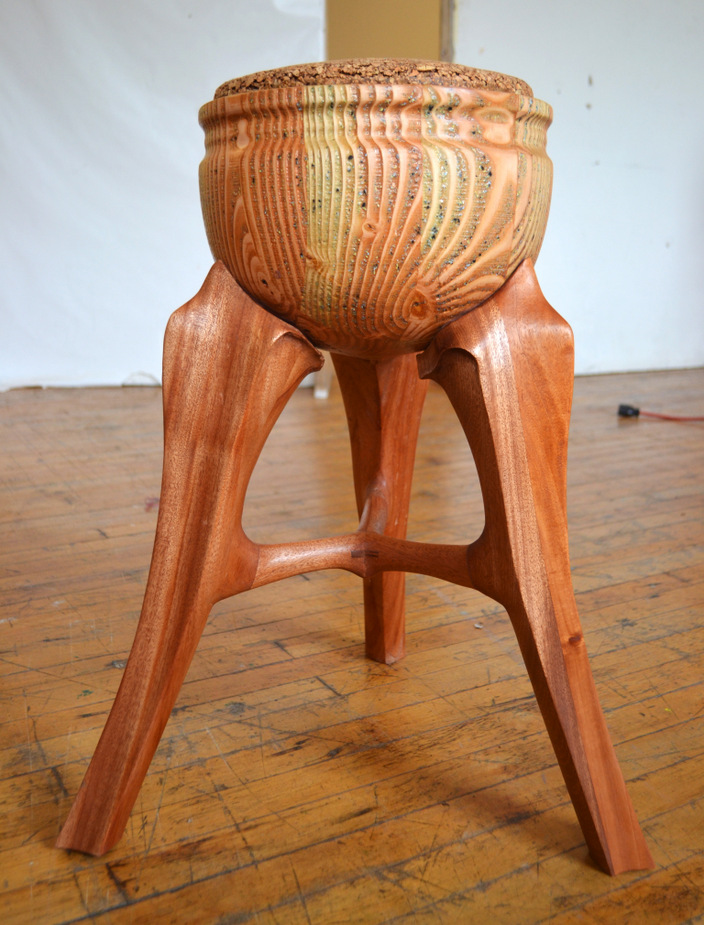
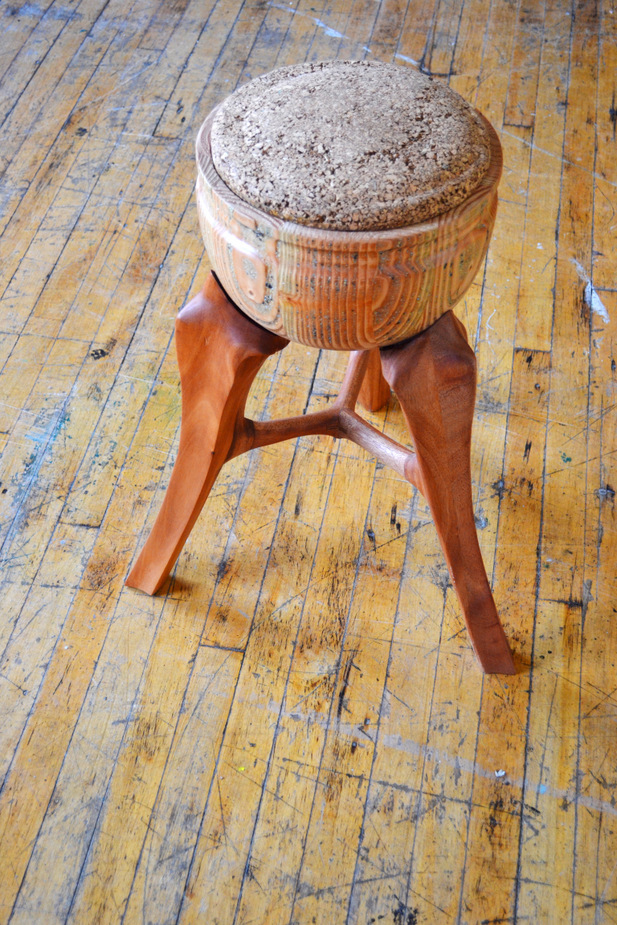
It began with a drawing. I doodled in my sketchbook before class and settled on a design I liked, and drew up the full-scale leg on paper. Problem was I’d drawn it with a hard edge facing outward and toward myself, like drawing a cube from a 45 degree angle. So I had to do some extreme mental trickery or find a way to mock this shape up so I could spin it around. I chose the latter. Also enrolled in a CAD class and experimenting with Blender 3D and Rhino, I was able to make this 3D leg pretty quick and rotate it around for the views I wanted. I printed out front and side views and used those as the templates to bandsaw out later. Not too shabby.
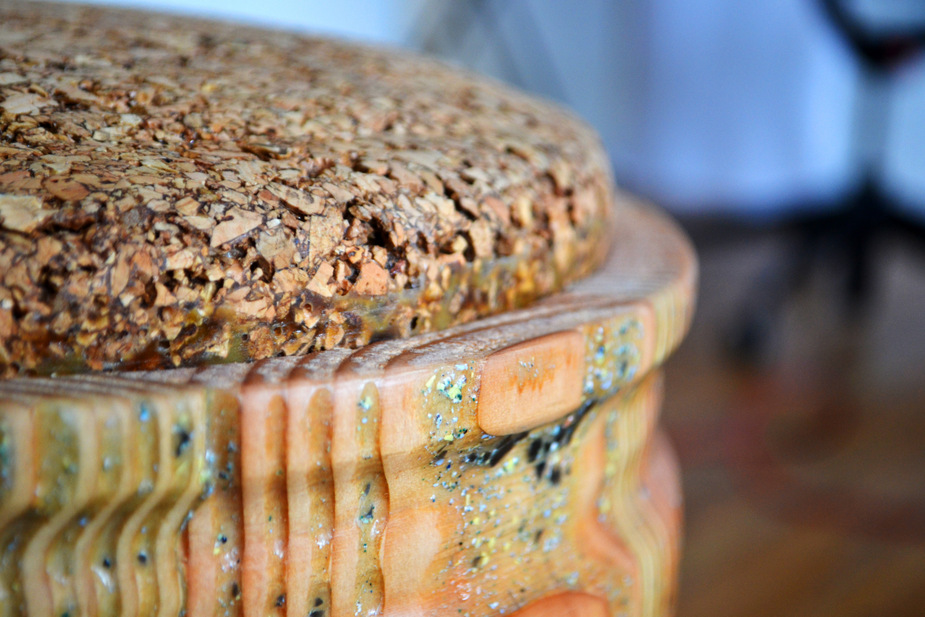
Oh, also a large part of this project hinged on the possibility of casting cork. I didn’t want to spend the cash on a block of it, and my parents had collected wine corks over the past 12-15 years, so I had a garbage bag packed full of them. I thought I’d just drop them in a blender and much ’em up with some glue and voila. And that’s pretty much what I did. I got the bowl part turned and filled with colored epoxy and sanded and finished (another series of experiments), made a circle template for a router and hollowed out about 1/2″ into the top of the bowl. I used the same template for my cork form, and with minimal sanding after the final cast had dried (about 3-4 days in front of a heater, the cork just sucks up wood glue). I even used a router to round over the top edge of the patty and cut in to the bottom edge a bit for a better fit. I sanding it down to super-smooth and oiled both the bowl and the patty and epoxied it in with a thick mix the night before my review. So casting ground up corks with wood glue is A-OK.
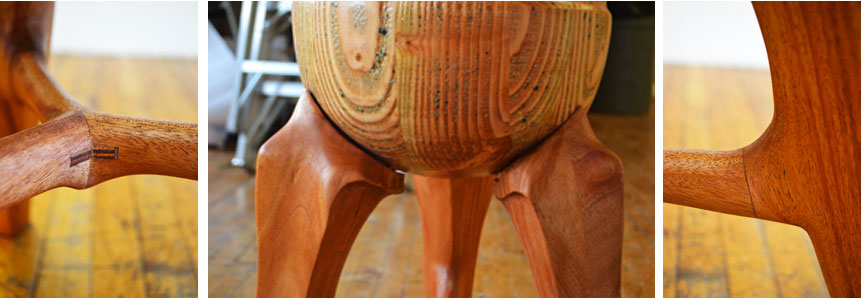
I made a plywood spline from mahogany scraps leftover from the process and calculated the shape as best I could. Not quite perfect, as you can see, but the whole thing was an experiment, right? I just filled it in with some epoxy. Thickening it with wood dust instead of the purple fairing filler we had would’ve been better, but hey, lesson learned
Mahogany provided by a friend Dan from the scrap bin at his large-scale cabinet shop. The things industrial sized operations throw away!
Nancy Faner Says:
How did you ever get the grain to show – stand out – on the bowl part of your sculpture? It is beautiful.
If You had told me you were using corks! I could have contributed some! Collecting them must be a family trait! HA!
Your work is beautiful, Blake. Really professional. I see a big change from your first efforts!
January 8th, 2014 at 2:19 am
runeshai Says:
Thanks, Gramma. I wire-brushed the bowl while it was on the lathe, which tore out a bunch of the softer wood (summer growth in softwoods like pine, fir, spruce, had much more open pores, looser structure, so it’s softer and breaks away with a wire brush or sandblasting). Then I covered the whole thing in epoxy with colorant and fake rock bits. Then I sanded it all back down on the lathe and oiled it a bunch. Came out pretty good I think. I’d use more colorant next time, maybe a tighter grain structure so there are streaks of turquoise instead of muddled areas of bluish hue, but it was a fun experiment.
January 8th, 2014 at 6:16 am