Undulating Slab Wine Table
Tuesday, December 5th, 2017 @ 2:49 pm
black, experiment, fun, furniture, jig, joinery, locust, oak, outdoor, router, slab, table, white, wine
Back when I was working on the Fisher Hill project I was able to take home a slab from one of the big logs we had on site, and it sat around my shop for a couple years since then. Finally this past summer I was able to get into making something fun and interesting with it. I had doodled something like this design a while back and knew at the time that it was what I wanted to use the slab for. So I had a doodle and a big piece of wood, and usually, for me, that’s all I need. So I drew up a full sized version, since this had some curves and tapers and details I hadn’t quite worked out in the thumbnail-sized sketch. And having that full-sized drawing helped a lot in making templates and jigs and figuring out the joinery for this piece. So I set to work.
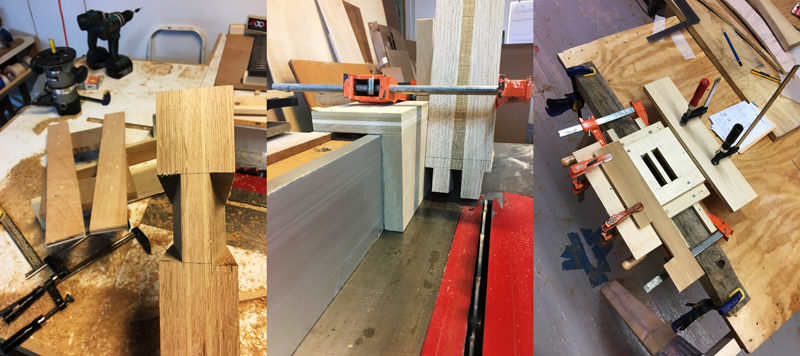
Making some jigs and cutting some joints.
I don’t have any bushings nor a plunge base for my router, so I basically relied entirely on the top-bearing flush trimming bit that I have, which worked pretty well for most of the project. The mortises (right-hand photo) were a bit sloppy, but I pinned them with two oak pegs that went all the way through the base, so I think it’ll hold up just fine. Besides, it’s always fun to make jigs and try out ideas; the results are just part of the learning process.
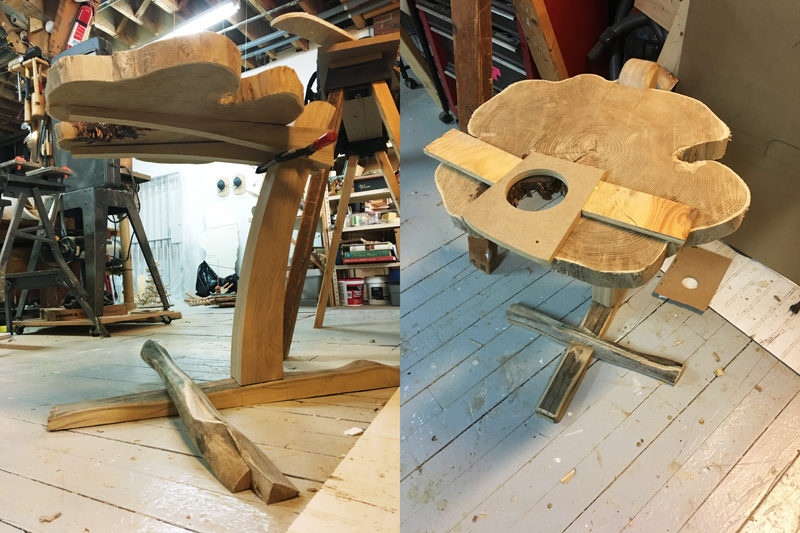
Assembly and cutting out spots for wine glasses and the bottle.
Next I figured out some overlapping joints for the base, and clamping the pieces into place gave me a better idea of how things would look and feel together. I drew out a curving, hourglass-like taper on the post, so that it would lose some weight, and figured out where the cutouts for the wine glasses would go, and the big one for the copper cup that will eventually hold the wine bottle. I still have to get some copper and hammer that piece out. It’s winter now, so my folks won’t need this table too soon.
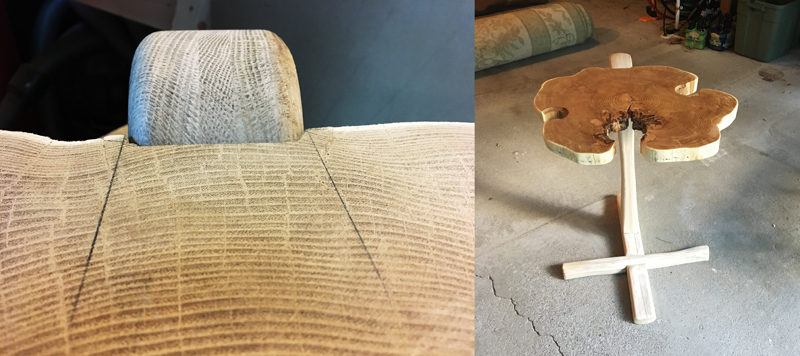
Rounding the top, scribing the slab to it, and getting some finish on the thing.
Once I cut the curve on the post, it was much nicer to look at, and way less bulky and heavy looking under that big slab. It looks a bit like some funky mushroom to me, and I think those cross feet could have used a bit more consideration, but the whole things was a fun experiment. I did this after the maple slab bench, so it was a good break from that way of building, and involved a lot more unplanned seat-of-my-pants style making, which is good to have every now and again. I really liked rounding that top nub and scribing the slab to its curves. I had a little tearout but it still looks alright. Once I get the copper cup made I’ll update with a few nice finished photos.
Comments
Thoughts on the stuff you read? You can leave a response, or trackback from your own site.
Leave a Reply